
Push Pull Legs Workout Routine: Gym and Home PPL Plan (2026)
A complete push pull legs workout routine: 3-day and 6-day splits, gym and home PPL plans with sets, reps and rest, plus warm-up, progression and recovery tips.

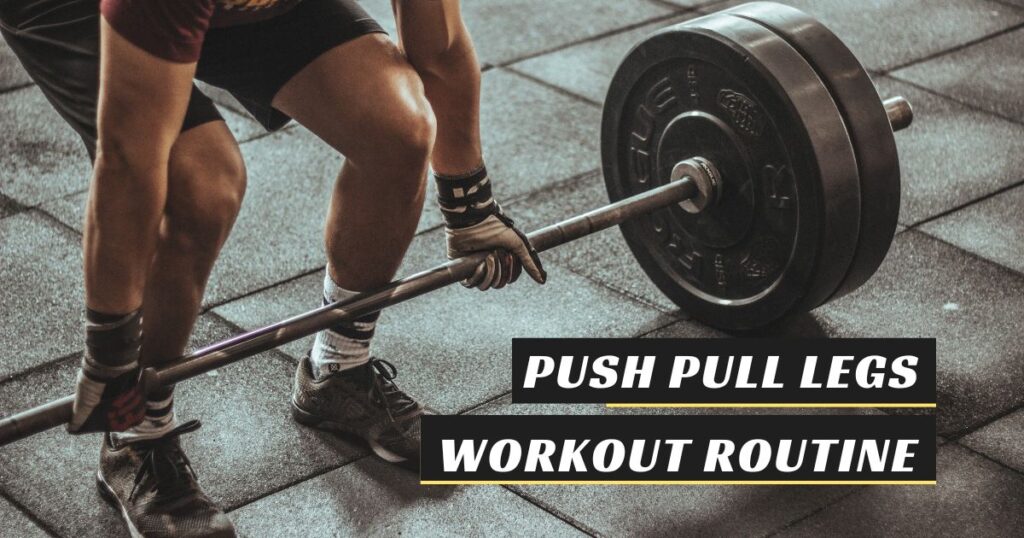
A push pull legs workout routine splits your training into three types of sessions: push days for chest, shoulders and triceps, pull days for back and biceps, and leg days for your lower body. You can run it three days a week if you’re a beginner or six days a week once you’re used to lifting, and this guide gives you both versions, with full gym and home plans.
Below you’ll find the weekly schedules, exercise tables with sets, reps and rest times, a dumbbell and bodyweight version for home, and the basics of warming up, progressing and recovering, so the plan keeps working week after week.
What Is a Push Pull Legs Workout?
PPL groups muscles by the job they do. Pushing muscles (chest, front of the shoulders, triceps) move weight away from your body. Pulling muscles (lats, upper back, rear shoulders, biceps) bring weight towards you. Legs (quads, hamstrings, glutes, calves) get a day of their own because they’re big muscles and need the most energy.
Because muscles that work together are trained together, one session doesn’t tire out the muscles you need for the next one. Your chest can rest on pull day and your back can rest on leg day. That’s why PPL lets you train often without the same muscles feeling sore every time you walk into the gym.
Who a PPL routine suits
- Beginners who want a simple structure they can follow without guesswork (start with the 3-day version).
- Intermediate lifters who have stopped making progress on full-body or “bro split” routines and want to train each muscle twice a week.
- Anyone training at home with a pair of dumbbells, since the push/pull/legs logic works just as well without machines.
- Men and women alike. The split is the same; only the weights and exercise choices change to suit your goals.
If you’re completely new to exercise, recovering from an injury, pregnant, or managing a condition such as high blood pressure, heart problems or joint pain, check with your doctor or a physiotherapist before you start lifting.
3-Day vs 6-Day PPL Split: Which Should You Pick?
The 3-day split trains each muscle group once a week and leaves plenty of time to recover. The 6-day split runs the cycle twice, so each muscle gets worked twice a week. That usually builds muscle faster, but only if your sleep, food and recovery can keep up.
| Day | 3-day PPL (beginner) | 6-day PPL (intermediate) |
|---|---|---|
| Monday | Push | Push A |
| Tuesday | Rest or walk | Pull A |
| Wednesday | Pull | Legs A |
| Thursday | Rest or walk | Push B |
| Friday | Legs | Pull B |
| Saturday | Rest or light cardio | Legs B |
| Sunday | Rest | Rest |
There’s also a middle option. A 4-day rotation (Push, Pull, Legs, rest, then repeat) means each session lands on a different weekday as the weeks go by. It suits people whose weekends are busy, or who find six days too much but want more than three.
Pick the version you can stick to for at least 8–12 weeks. Three good sessions every week will get you further than six sessions you keep skipping.
Full Gym Push Pull Legs Workout Plan
Each session takes roughly 50–70 minutes including the warm-up. Start every day with the compound lift (the first exercise), when you’re freshest, and finish with the smaller isolation moves. On the 6-day plan, use these as your “A” days and the variations listed under each table as your “B” days.
Push day: chest, shoulders, triceps
| Exercise | Sets × reps | Rest |
|---|---|---|
| Barbell or dumbbell bench press | 4 × 6–10 | 2–3 min |
| Seated dumbbell shoulder press | 3 × 8–12 | 2 min |
| Incline dumbbell press | 3 × 8–12 | 90 sec |
| Cable or dumbbell chest fly | 3 × 10–15 | 60–90 sec |
| Lateral raises | 3 × 12–15 | 60 sec |
| Triceps rope pushdown | 3 × 10–15 | 60 sec |
Push B swaps: make the standing overhead press your main lift, then use the machine chest press, assisted or bench dips, and overhead triceps extensions. For more shoulder options, see our guide to shoulder exercises in the gym.
Pull day: back, rear delts, biceps
| Exercise | Sets × reps | Rest |
|---|---|---|
| Pull-ups or lat pulldown | 4 × 6–10 | 2–3 min |
| Barbell or chest-supported row | 3 × 8–12 | 2 min |
| Seated cable row | 3 × 10–12 | 90 sec |
| Face pulls | 3 × 12–15 | 60 sec |
| Barbell or dumbbell biceps curl | 3 × 10–12 | 60 sec |
| Hammer curls | 2 × 12–15 | 60 sec |
Pull B swaps: start with a deadlift or rack pull (3 × 5) if your form is solid, then do single-arm dumbbell rows, a close-grip pulldown and incline dumbbell curls. If you’re new to back training, our back exercises for beginners at the gym explains each movement in more detail.
Leg day: quads, hamstrings, glutes, calves
| Exercise | Sets × reps | Rest |
|---|---|---|
| Back squat or goblet squat | 4 × 6–10 | 2–3 min |
| Romanian deadlift | 3 × 8–12 | 2 min |
| Leg press | 3 × 10–15 | 90 sec |
| Walking lunges | 3 × 10–12 per leg | 90 sec |
| Leg curl (machine) | 3 × 10–15 | 60 sec |
| Standing calf raises | 4 × 12–20 | 60 sec |
Legs B swaps: use front squats or the hack squat as your main lift, then hip thrusts, Bulgarian split squats, leg extensions and seated calf raises. Finish either leg day with 5–10 minutes of core work such as planks or dead bugs.
PPL Workout at Home (Dumbbells and Bodyweight)
You don’t need a gym membership to follow a push pull legs plan. A pair of adjustable dumbbells, a sturdy chair or bench, and ideally a doorway pull-up bar or resistance band will cover almost everything. If you have no equipment at all, use the bodyweight option in each row.
Home push day
| Exercise (dumbbell / bodyweight option) | Sets × reps | Rest |
|---|---|---|
| Floor press / push-ups (knee push-ups to start) | 4 × 8–15 | 90 sec |
| Seated dumbbell press / pike push-ups | 3 × 8–12 | 90 sec |
| Feet-elevated push-ups | 3 × as many as you can with good form | 90 sec |
| Lateral raises (dumbbells or water bottles) | 3 × 12–15 | 60 sec |
| Chair dips / overhead dumbbell triceps extension | 3 × 10–15 | 60 sec |
Home pull day
| Exercise (dumbbell / bodyweight option) | Sets × reps | Rest |
|---|---|---|
| Pull-ups or negatives / band pulldowns | 4 × 5–10 | 2 min |
| Single-arm dumbbell row / table (inverted) row | 3 × 10–12 per side | 90 sec |
| Bent-over reverse fly / band pull-aparts | 3 × 12–15 | 60 sec |
| Dumbbell biceps curl / towel or band curl | 3 × 10–12 | 60 sec |
| Superman hold | 3 × 20–30 sec | 45 sec |
Pulling is the hardest thing to train without equipment. A table row works: lie under a solid dining table, grip the edge and pull your chest up to it. Only do this if the table is heavy and stable enough to take your weight safely.
Home leg day
| Exercise (dumbbell / bodyweight option) | Sets × reps | Rest |
|---|---|---|
| Goblet squat / bodyweight squat | 4 × 10–15 | 90 sec |
| Dumbbell Romanian deadlift / single-leg hip hinge | 3 × 10–12 | 90 sec |
| Bulgarian split squat (rear foot on a chair) | 3 × 8–12 per leg | 90 sec |
| Glute bridge or hip thrust | 3 × 12–20 | 60 sec |
| Single-leg calf raise on a step | 3 × 12–20 per leg | 45 sec |
Home workouts get easy quickly, so make them harder on purpose: slow the lowering phase to 3 seconds, add a pause at the bottom, or move to single-arm and single-leg versions. For extra midsection work on leg days, try this core workout plan at home.
How to Warm Up Before Each Session
A proper warm-up takes 8–10 minutes and makes your first working sets feel smoother and safer. In a hot, humid Indian summer you’ll warm up faster, but don’t skip the joint prep.
- 3–5 minutes of light cardio: brisk walking, cycling, skipping or easy jumping jacks.
- Dynamic mobility: arm circles, band pull-aparts and cat-cows for push/pull days; leg swings, hip circles and bodyweight squats for leg day.
- Ramp-up sets: do 2–3 lighter sets of your first exercise (around 40%, 60% and 80% of your working weight) with low reps before your real sets.
Form Cues for the Main Lifts
- Bench press / push-ups: squeeze your shoulder blades together, keep your elbows at roughly 45° from your body (not flared straight out), and lower under control.
- Shoulder press: brace your core and squeeze your glutes so your lower back doesn’t arch as you press overhead.
- Rows and pulldowns: start each rep by pulling your shoulder blades back and down, then drive your elbows towards your hips. Don’t swing your body.
- Squats: feet about shoulder-width apart, knees tracking in line with your toes, chest up, and go only as deep as you can while keeping your back neutral.
- Romanian deadlifts: push your hips back with a slight knee bend, keep the weight close to your legs and stop when you feel a strong hamstring stretch, before your back rounds.
Sharp pain, pain in a joint, or pain that’s still there the next day is a signal to stop. A normal muscle burn is fine. If it doesn’t settle within a few days, see a physiotherapist rather than training through it.
Progressive Overload: How to Keep Improving
Your muscles adapt to whatever you ask of them, so the work has to get slightly harder over time. The simplest method is double progression: pick a rep range (say 8–12), stay at one weight until you can do every set at the top of the range with clean form, then add the smallest weight jump available and work back up from 8.
- Log every session in a notebook or app so you know what to beat next time.
- Finish most sets with 1–3 reps still in the tank, rather than grinding to failure on heavy compound lifts.
- At home, progress by adding reps, slowing the tempo, cutting rest time or switching to harder variations.
- Every 6–8 weeks, take a lighter “deload” week at about half your usual sets to let your joints and nervous system catch up.
Beginner vs Intermediate Adjustments
| Factor | Beginner (0–6 months) | Intermediate (6+ months) |
|---|---|---|
| Days per week | 3 (one cycle) | 4–6 |
| Exercises per session | 4–5 | 5–7 |
| Sets per exercise | 2–3 | 3–4 |
| Main lift choice | Machines, dumbbells, goblet squats | Barbell squat, bench, rows, deadlift variations |
| Focus | Learning form, building the habit | Adding load, managing recovery |
Beginners should start with weights that feel almost too easy for the first two weeks. You’re teaching your body the movements, and the soreness from a new routine is real. If you want a structured on-ramp before PPL, browse our free workout plans.
Rest, Recovery and Protein
Muscle is built while you recover, not during the workout itself. Aim for 7–9 hours of sleep, drink plenty of water (more on sweaty, humid days), and keep at least one full rest day each week. Light walking, stretching or yoga on off days helps you feel less stiff.
Many Indian diets are light on protein, so it helps to include a good source at every meal. Easy options:
- Vegetarian: paneer, curd and hung curd, dals, rajma, chana, soya chunks, tofu, sattu, peanuts.
- Non-vegetarian: eggs, chicken breast, fish and lean mutton.
- Convenience: milk, or a whey protein shake if you struggle to reach your target from food.
For more ideas, see these protein-rich foods, and read up on common whey protein myths before you buy a supplement. If you have kidney problems or another medical condition, ask your doctor or a registered dietitian how much protein is right for you.
Common PPL Mistakes to Avoid
- Jumping straight to six days. Beginners who start with the 6-day split often burn out or get joint pain within a month.
- Ego lifting. Loading more weight than you can control, cutting reps short or swinging the weight takes work away from the target muscle and raises your injury risk.
- Skimping on pull day. Doing lots of pressing and very little rowing can leave your shoulders rounded forward. Aim for at least as many pulling sets as pushing sets.
- Skipping leg day. Legs are half your muscle mass, and squats and hinges also build your core and posture.
- Changing exercises every week. Keep your main lifts the same for a full training block, otherwise you can’t tell whether you’re getting stronger.
- Ignoring sleep and food. No split can make up for 5-hour nights and too little protein.
Frequently Asked Questions
Is a push pull legs workout good for beginners?
Yes, as long as you start with the 3-day version, light weights and 4–5 exercises per session. The structure is easy to understand and leaves plenty of recovery time. Once you’ve trained consistently for a few months, you can move up to four or six days.
Can I do a PPL workout at home without a gym?
Yes. Push-ups, pike push-ups, rows, squats, split squats and hip hinges cover every muscle group, and a pair of dumbbells or resistance bands makes progress much easier. A doorway pull-up bar is the single most useful upgrade for home pull days.
How long should a PPL session take?
Most sessions take 45–70 minutes, including the warm-up. If you’re short on time, keep the first two exercises and drop one or two isolation moves; the compound lifts give you the most return for your effort.
Can I add cardio to a push pull legs routine?
Yes. Do 20–30 minutes of walking, cycling or swimming on rest days, or a short session after upper-body days. Avoid hard cardio right before leg day, because tired legs make squats and deadlifts less safe.
Is PPL good for weight loss?
PPL helps you build or keep muscle while you lose fat, but fat loss mainly comes down to eating slightly less than you burn over time. Combine the routine with a sensible diet, enough protein and daily walking. How fast you change will vary from person to person.
Should women follow the same PPL plan?
Yes. The split works the same way for everyone. Many women choose to add an extra glute exercise, such as hip thrusts, on leg day, and adjust weights to their own level. Lifting with progressive overload builds strength and shape; it won’t make you “bulky” by accident.
Start Your PPL Routine This Week
A push pull legs workout routine is simple, flexible and works in a gym or at home. Pick the 3-day or 6-day version, start lighter than you think you need to, log your lifts and add a little weight or a few reps over the weeks. With good sleep, enough protein and steady effort, you’ll see your strength go up, and if anything hurts beyond normal soreness, get it checked by a professional.

Join the conversation