Natural Makeup Routine for Beginners: 7 Easy Steps (2026)
Learn a simple 10-minute natural makeup routine for beginners: skin prep, a sheer base, soft colour and definition, plus tips for Indian skin and weather.


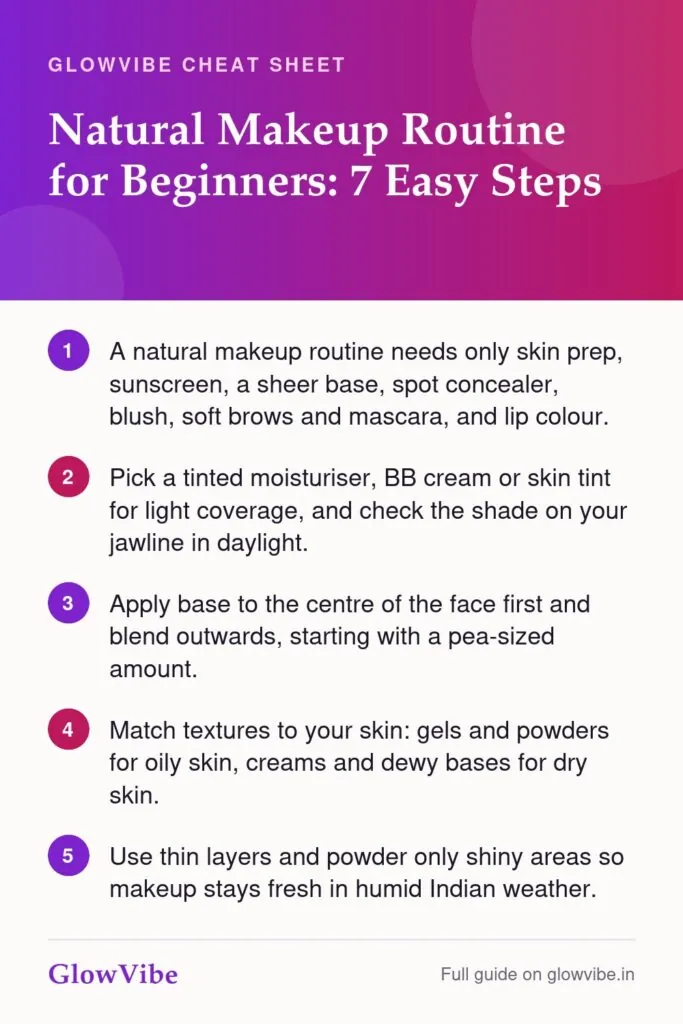
A natural makeup routine for beginners needs just six steps: prep your skin, apply sunscreen, even out your base with a light tint, conceal only where needed, add a little colour to your cheeks, eyes and lips, then set the areas that get oily. You can do the whole look in about 10 minutes with five or six products, and it should look like your skin on a good day, not like makeup.
This guide walks you through each step in order, helps you pick a base that suits your skin type and the Indian weather, and flags the beginner mistakes that make “natural” makeup look heavy or patchy by lunchtime.
What a natural makeup look actually means
Natural makeup (often called the “no-makeup makeup” look) is about evening out and brightening rather than covering up. Your freckles, a bit of skin texture and your real brow shape are allowed to show. The goal is to look rested, fresh and a little more polished.
For a beginner, this is the easiest place to start. Sheer products are forgiving, mistakes are easy to blend away, and you learn the basic order of application that every fuller look builds on later.
Your beginner natural makeup kit: the essentials
You don’t need a full vanity. Start with these and add more only once you know what you actually reach for:
- Skin prep: a gentle cleanser, a lightweight moisturiser and a Broad spectrumA sunscreen label meaning it protects against both UVB rays (which cause burning) and UVA rays (which cause tanning and ageing).See glossaryRead the guide sunscreen (SPF (sun protection factor)A measure of protection against UVB rays, which cause sunburn. SPF 30 blocks about 97% of UVB and SPF 50 about 98%, if you apply enough and reapply.See glossaryRead the guide 30 or higher).
- Base: one sheer base product, such as a tinted moisturiser, BB or CC cream, or a lightweight foundation you sheer out.
- Concealer: one shade that matches your skin, for spots and redness around the nose.
- Cheeks: a cream or powder blush in a soft peach, rose or berry, plus an optional matte bronzer.
- Eyes and brows: a brow pencil or tinted brow gel, a brown or black mascara, and a kajal if you like definition.
- Lips: a tinted lip balm or a sheer lipstick close to your natural lip colour.
- Optional: a translucent loose or pressed powder for oily areas, and a damp makeup sponge or a fluffy brush.
Choosing a base for natural makeup: quick comparison
The base is where most beginners go wrong, usually by picking too much coverage or the wrong shade. Here is how the common light-coverage options compare:
| Base product | Coverage | Finish | Best for |
|---|---|---|---|
| Tinted moisturiser | Sheer | Dewy | Dry or normal skin, good skin days, minimal routines |
| BB cream | Sheer to light | Natural to dewy | Normal to combination skin wanting a little more evening out |
| CC cream | Light | Natural | Redness, dullness or uneven tone |
| Skin tint / serum foundation | Sheer to light, buildable | Skin-like | Most skin types; easy to blend with fingers |
| Lightweight liquid foundation (sheered out) | Light to medium, buildable | Natural or matte | Oily skin, humid weather, or when you want more staying power |
Many tinted moisturisers and BB creams come with SPF, but treat that as a bonus. You rarely apply enough base to get the protection on the label, so wear a separate sunscreen underneath.
Natural makeup routine for beginners: step by step
Step 1: Cleanse and moisturise
Makeup only looks natural on skin that is clean and comfortable. Wash with a gentle cleanser to remove overnight oil and sweat, then pat your face dry rather than rubbing.
Follow with a moisturiser that suits your skin: a gel or water-based one for oily skin, a richer cream for dry skin. Give it two or three minutes to sink in. If your skin feels tight, base will cling to dry patches; if it is greasy, base will slide. A simple three-step minimalist skincare routine is all the prep you need.
Step 2: Sunscreen (and primer only if you need it)
Apply sunscreen as the last skincare step, about two finger-lengths for the face and neck. In India’s strong sun this matters more than any makeup product. Let it set for a few minutes so your base doesn’t pill on top of it.
Primer is optional for a natural look. Use one only if you have a clear reason, such as large pores on the nose or a very oily T-zone in humid months. If you do, match it to your base; this guide on water-based vs oil-based primer explains why that matters.
Step 3: Apply a light, even base
Dot a small amount of your base on the centre of the face (forehead, nose, cheeks, chin) and blend outwards towards the hairline and jaw. The centre of the face usually needs the most evening out; the edges need very little. Start with less than you think, about a pea-sized amount, and build only where needed.

Fingers work well for tinted moisturisers and skin tints because body warmth melts the product into the skin. A damp sponge gives the most seamless, sheer finish for liquid foundation. To check the shade, swatch it along your jawline in daylight; it should disappear into both your face and neck. Most Indian skin tones have warm, golden or olive undertones, so shades that look pink or grey on you are a mismatch.
If you are using foundation, avoid the usual traps like heavy layers or skipping the neck. Our guide to common foundation mistakes and how to fix them covers these in detail.
Step 4: Conceal only where you need it
Instead of covering your whole face, use concealer as a spot treatment. Tap a tiny dot onto a pimple, a dark mark or redness around the nostrils, wait a few seconds, then pat the edges with a fingertip until it blends away.
For dark circles, a concealer just slightly lighter than your skin works, but keep it thin. If your under-eyes look grey or ashy after concealing, a peach-toned corrector underneath helps cancel the darkness on deeper Indian skin tones.
Step 5: Add warmth with blush and bronzer
Blush is what makes a natural look appear healthy rather than flat. Smile, then tap a small amount of cream blush onto the apples of your cheeks and blend it slightly upwards towards the temples. Cream formulas melt into the skin and look the most like a real flush; powder blush lasts longer on oily skin.
Bronzer is optional. If you use it, choose a matte shade only one or two tones deeper than your skin and sweep it lightly where the sun naturally hits: the top of the forehead, the temples, under the cheekbones and along the jaw. Too much shimmer or too dark a shade reads as muddy on brown skin.
Step 6: Define brows and eyes softly
Brows frame the face, so even a minute spent on them makes a big difference. Brush them upwards with a spoolie, then fill only the sparse gaps using light, hair-like strokes with a pencil one shade lighter than your hair. A clear or tinted brow gel keeps them in place in humid weather.
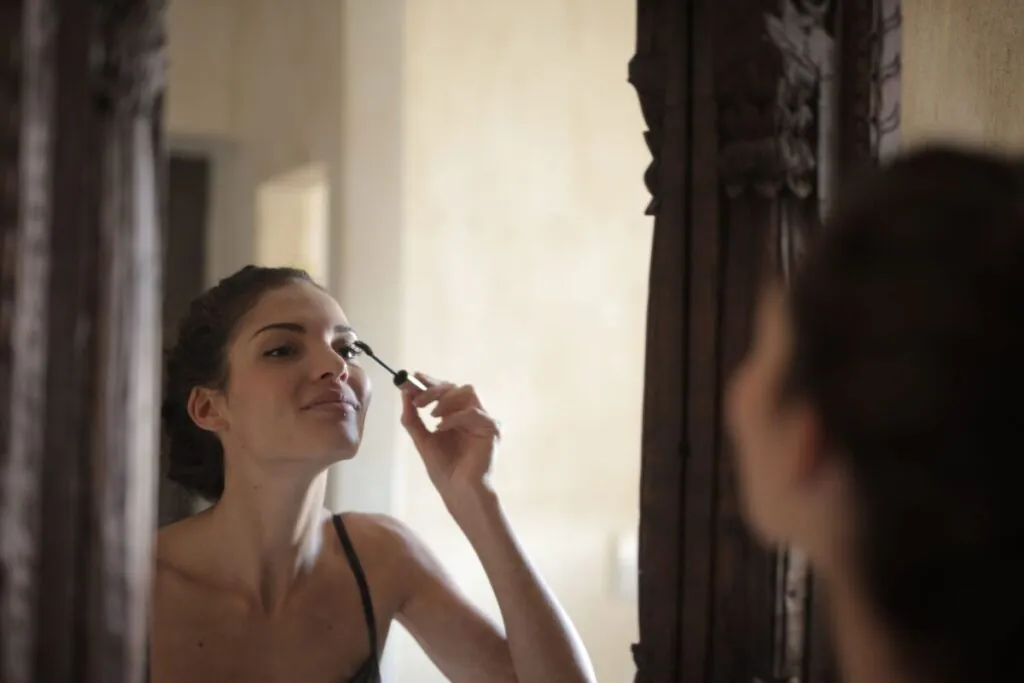
For eyes, curl your lashes if you like, then apply one coat of mascara, wiggling the wand at the roots and pulling it to the tips. Brown mascara looks softest; black gives more definition and suits most Indian lash colours well. If you love kajal, smudge a thin line close to the lash line and soften it with a cotton bud for a diffused look rather than a sharp line.
Step 7: Finish with lips and a light set
Pick a tinted lip balm or sheer lipstick close to your natural lip colour, or one shade deeper. Rosy browns, soft mauves and warm pinks suit most Indian skin tones for daytime. If you want ideas on formulas and finishes, see our guide to lip makeup products.
Finally, press a little translucent powder only on the areas that get shiny, usually the forehead, nose and chin. Leave the cheeks unpowdered for a fresher look. Our face powder guide explains loose vs pressed and how much to use.
How to adapt natural makeup to your skin type
- Oily skin: use a gel moisturiser, a mattifying or oil-free base, powder blush, and set the T-zone. Carry blotting papers rather than adding more powder through the day.
- Dry skin: moisturise well, choose a tinted moisturiser or dewy skin tint, stick to cream blush and skip powder except on the sides of the nose.
- Combination skin: a natural-finish BB cream or skin tint works well; powder only the T-zone.
- Sensitive or acne-prone skin: look for Fragrance-freeA product with no added perfume or essential oils for scent. Often the safer pick for sensitive or reactive skin. "Unscented" can still contain masking fragrance.See glossary and Non-comedogenicA label meaning a product is formulated not to clog pores. Useful for acne-prone skin, though it is not a regulated or guaranteed claim.See glossaryRead the guide products, introduce one new product at a time, and Patch testTrying a small amount of a new product behind the ear or on the inner arm for a few days to check for a reaction before using it widely.See glossary behind the ear or on the jawline for a couple of days first. If you get persistent breakouts, itching or redness, stop the product and see a dermatologist.
Natural makeup for Indian weather
Heat and humidity are the biggest challenge for makeup in most Indian cities. In summer and the monsoon, use fewer layers, swap creams for gel textures, and rely on water-resistant mascara and a brow gel. Thin layers stay put far better than one thick one.
In dry winters, especially in North India, the opposite applies: hydrate more, choose dewier bases and cream products, and use a lip balm before your lip colour. If you live somewhere with hard water and your skin feels tight after washing, a richer moisturiser before makeup helps your base sit smoothly.
Common natural makeup mistakes beginners make
- Wrong base shade: testing on your hand or in shop lighting. Always check on the jawline in daylight.
- Too much product: the most common reason natural makeup looks cakey. Start small and build.
- Skipping skin prep: base settles into dry patches or slides off oily skin.
- Over-powdering: it flattens the skin and can look grey on deeper tones.
- Harsh brows or liner: blocky brows and sharp wings pull the look away from “natural”.
- Sleeping in makeup: always remove it fully at night. A makeup remover face wash or a cleansing balm followed by your usual cleanser does the job.
Frequently Asked Questions
Cleanse, moisturise and apply sunscreen first. Then go base, concealer, blush and bronzer, brows, mascara and kajal, lips, and finally a light dusting of powder where you get oily. Liquids and creams go before powders so they blend smoothly.
Yes. The technique stays the same; only the textures change. Oily skin does better with gel and powder formulas, dry skin with creams and dewy bases, and sensitive skin with fragrance-free, non-comedogenic products that you patch test first.
No. Many people use only concealer, blush, mascara and lip balm. If you want some evening out, a tinted moisturiser, BB cream or skin tint gives lighter coverage than most foundations and looks more like skin.
Use less product, apply it in thin layers and blend each step well before moving on. Choose cream textures over powders where your skin allows, powder only the shiny areas, and spray or pat a little water over the face with a damp sponge to melt everything together.
Not automatically. Plant-based ingredients and essential oils can irritate sensitive skin just as easily as synthetic ones. What matters more is that a product suits your skin type, is non-comedogenic if you break out, and doesn’t cause a reaction in a patch test.
Start with a light gel moisturiser and let your sunscreen set before your base. Use thin layers, a long-wearing or oil-free base, powder blush, water-resistant mascara and brow gel, and set the T-zone. Blot with tissue paper during the day instead of adding more powder.
Yes. Keep the same fresh base and simply turn up one feature: a bolder lip, a softly shimmery eyeshadow, or a deeper kajal. Add a little more concealer and setting powder for photos and long hours, so the look holds up while still looking like you.
Quick poll
What does your everyday makeup look like?
Your natural look, in 10 minutes
A good natural makeup routine is less about products and more about restraint: healthy skin, a sheer base in the right shade, a touch of colour and soft definition. Practise the steps a few times, keep what works for your skin and the season, and let the rest go.
Once you are comfortable with this everyday look, you can build on the same base for festive and party looks whenever you want a little more drama.